I’m going to show you how to connect your laptop screen to your desktop computer. The steps are easy and will only take a few minutes of time from start to finish I’ll be using Windows 10 as the operating system for my instructions but these same steps should work with any version of Windows, as well as Mac OSX. In this post I’ll cover how to set up a dual display mode in Windows 10 that will allow you some neat features like mirroring or extending your desktop onto both screens. You can also use one monitor for multiple tasks side by side which is great if you’re trying to multitask.
Steps:
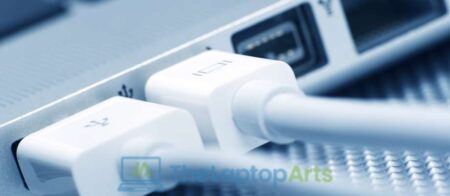
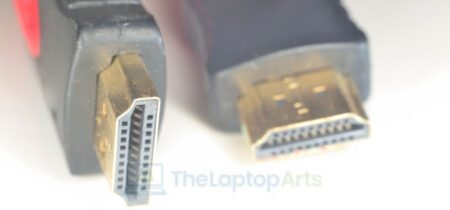
1) To start, you’ll want to go ahead and connect your laptop screen to your PC. This is done by simply plugging the monitor into the video port on your computer via an HDMI cord . If you don’t have one laying around, they’re pretty cheap to buy $5-$10 -basically it’s a cable that has a standard HDMI end that plugs into both your computer and then another end that is split into two HDMI cables . One is for going from your laptop to the monitor and the other goes from the monitor back to your computer.
2) Now once you’ve got everything plugged in, Windows 10 will automatically detect this new screen and you’ll have to go outside of your computer’s setting in order enable the display settings. If you don’t, you won’t see anything when you turn on or reboot your laptop.
3) Go ahead and right click on the desktop screen in Windows 10 – I suggest doing this in a spot where it won’t be in the way – drag up to bring up the context menu shown below then select Personalize . On this page, select Display from the left panel then scroll down toward the bottom of this page until you find Multiple displays . From there, tick off Extend these displays to use both my monitors , then hit Apply , accept all displayed messages by hitting OK , and allow Windows time for all changes to be made before continuing.
4) This is one of the oldest connectors. They use an HD15 connector to make a connection between a PC or laptop and a monitor. Although it can get a few high frame rates and resolutions, they transmit an analog signal.
5) DVI adapters and connectors are newer and they offer a sharper and better display compared to VGA adapters. They carry both analog and digital signals. It is quite easy to differentiate them from VGA connectors since they are white while VGA connectors are blue.
6) The next time you reboot your computer, both screens will be enabled and working – congrats! You can now use your laptop screen as a second monitor for your PC.
If you want to change the orientation of your displays, go back into Display settings from step 3 and choose which display should be on the left or right side . This can be handy if you want to mirror content or have different windows open on each screen.
7) Lastly, if you’re using your laptop as a primary monitor and want to disable the built-in one, simply unplug the HDMI cable going from the laptop to the desktop monitor and Windows 10 will revert back to using just that one screen.
So there you have it – connecting your laptop screen to your PC is a pretty easy process that can be done in a few minutes. If you have any questions or run into any problems, feel free to leave a comment below and I’ll do my best to help you out.