If you want to get the most out of your games, overclocking is something that you should look into. Overclocking essentially means running your CPU at a faster rate than it was designed for. You can do this by adjusting the voltage or multiplier settings in the BIOS. If done correctly, you can see a significant increase in performance while using less power and generating less heat than if you were to run at stock speeds. This allows gamers who have an older system to still be able to play newer games on high settings without having to upgrade their entire computer system! Plus, its always fun playing around with hardware until it breaks (and then fixing it)
overclocking is a great way to get started. For older gamers, overclocking would also allow you to relive the experience of playing games on your old computer
Before we can get into how to overclock, lets discuss why you should even bother with it. If you want 100% stability and performance then overclocking isn’t for you; however if you’re looking for that little extra boost in speed then this guide will help walk you through the process. Your CPU definitely won’t be able to match a brand new system (and probably not even one generation newer), but it will still provide an improved gaming experience so long as you don’t push it too hard. There are two basic methods which can be used in overclocking: adjusting the multiplier or adjusting voltage.
Adjusting the Multiplier
This method makes it possible to overclock without changing any of the other settings, meaning that its very easy to do and can be done on all motherboards. The multiplier dictates how fast your CPU is running so basically this involves increasing the number by some value (lets say 10%). This would mean that for every tick of the system clock, your CPU ticks 10% faster with respect to time. If your CPU was running at 3.5GHz before with a stock multiplier of 35 then after overclocking, it will now run at 3.85GHz! You can do this simply by going into BIOS and increasing the “CPU Multiplier” option but this is where it gets a little more complex.
Adjusting Voltage
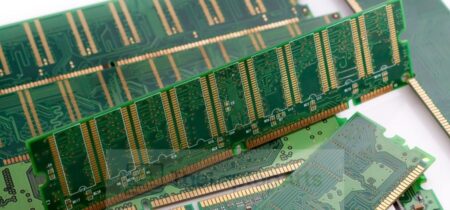
The second method requires that you have a high-end motherboard with voltage control options as well as a way to read what the current voltage is (usually an LCD which can be bought for ~$5). To overclock using this method, you would first need to increase the Vcore setting; however if your system isn’t stable (meaning its crashing frequently or not booting), then simply lower it again and keep increasing until you find the maximum amount at which your system remains stable. This will give slightly better performance than adjusting the multiplier but does require quite a bit more work.
CPU is capable overclocking
if your CPU can’t hit past a certain clock speed (usually 4-5GHz), you can still overclock using the multiplier method as discussed above.You may be right but many BIOS’s now come with their own overclocking settings which include everything you need to get started
BIOS
its actually easier than it looks. When you first to keep it from overheating.This is a common misconception. Depending on the type of cooling solution that you have on your CPU, one could expect a performance increase with even as low as 2.0GHz being introduced to the system
CPUID HWMonitor
Great tool for monitoring temperatures and identifying what programs are using how much power. Also displays edition information as well as FSB/multiplier settings, etc… TechPowerUp GPU-Z – Similar to CPUID HWMonitor above but shows GPU info as well. MSI Afterburner – This is actually a video card overclocking tool but also works with processors (both AMD and Intel). It’s probably the most advanced overclocking software out there and is even able to overclock your memory! AMD Overdrive – Similar to MSI Afterburner, described above. Intel XTU – This one also works for both processors and video cards.