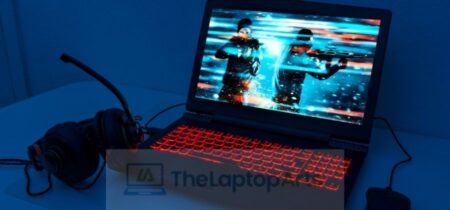
There are many ways to test your laptop screen. One way is to place a piece of paper behind the computer screen and see if you can see anything through the paper. This tells you how well the backlight is working on your laptop. Another way would be to use an ambient light meter, which will tell you how much light is being emitted from the monitor at various angles. Some people also like to use a flashlight or shining their phone’s flashlight onto their screens for tests as well! The best option for testing screens, though, would be using a colorimeter because it measures specific values that indicate whether or not there are any problems with your laptop’s display quality.
laptop screen’s pixel
Preferable for this test due to the LCD displays’ high contrast ratio and wide view range, but any other picture or writing can also be used. The resolution of the pictures or writings shall not exceed 720p so as to avoid breaking down the laptop’s display quality.
The second step involves turning off power saving mode, letting your monitor follow its own settings without interference from hardware level power saving features, if your monitor has one. This also applies for laptops with brightness control buttons; ensure that both are turned all the way up before proceeding to next steps. It is important that you do not touch anything at this point, look only!
Now comes the most important part, the last – but most important – step, observe how the pixels are distributed on the screen. Your eyes shall not be focused on any one pixel specifically, nor should you examine any two pixels next to each other (due to tell tale patterns that might pop up and skew your conclusions.)
Use your peripheral vision instead by first observing a small area of about 1-2 cm² and then expanding your focus over bigger areas as seen fit. This is because detailed inspection can easily fool our brains , we tend to overlook defects when our gaze is too concentrated. By looking at bigger areas it becomes harder for us to ignore these visual artefacts by mistake . The absence of such artefacts can also indicate good display quality! It’s important to understand that you aren’t trying to find any specific thing, but rather searching for the absence of all things.
Stuck Pixel(s):
Dead pixels that show the same colour all the time, usually black or white. Stuck pixels are easy to spot when observing solid colours because its colour is either too dim/intense for what it should be. Normal screens have no dead pixels at all.
Similar to stuck pixel problem but occurs on vertical lines instead of horizontal lines , due to physical limitations or faulty hardware design. They can also appear as a whole area with defective columns/lines that’s shifted down/across one row respectively. These flaws are mostly caused by faulty capacitors inside your screen.
Clouding:
A clouding effect can be caused by an improperly designed backlight unit. The problem here is that the light bleeds into dark areas, making them appear brighter than they should be. This flaw results in loss of contrast and darker colours not appearing very deep or dark because of bleeding light; the opposite holds true for lighter colors!
Bleeding:
This is quite similar to clouding, but instead it’s stains on top of what should be white. White bleed like this could make other colors seem slightly blueish (or warmer if seen during night time.)
Dead pixel line(s):
Unlike dead pixel lines that are one whole row/column shifted down/across respectively, this one appears as a horizontal (or vertical) line(s) of stuck pixels.
Deformation:
This shows as a distortion in the image and is usually caused by physical damage, although it can also appear due to faulty hardware design (e.g. bad resolution scaling.
Overdrive:
If your monitor or laptop has adaptive (PWM) backlight control then you’ll notice blotches/pulses instead of a smooth gradual change between light and dark during lower intensity levels. They’re mostly noticeable at night time because of surrounding darker areas, but could show up anytime really. It’s almost impossible to tell whether overdrive is on or off just by looking so it’s best to check around forums for technical information regarding your monitor model instead.
High contrast ratio:
The difference between brightest and darkest colors as possible – is key for image quality. You’ll want to be able to recognize all the previously mentioned flaws immediately, that’s why this laptop screen test is important. The best way to explain how it works is by using an example a normal display has absolutely no dead pixels and won’t show any type of defects such as dust particles, light bleed or clouding. This particular unit also has no overdrive error, making the backlight adjustment perfectly smooth without any blotches/pulses during low intensity levels.